How does composting work?
Picture to yourself what happens if you drop an apple core on a forest floor. Over time, bacteria, fungi, worms and other tiny soil life break it down, until it becomes part of the soil. This is what happens to all living things when they die.
We can use this natural process in our own homes, gardens or allotments to make compost. Compost feeds your soil – then your soil feeds your plants.
Become a compost masterchef
Learning how to compost is a bit like learning to cook. Just like cooking, you need a nice mix of ingredients to make good compost, and these might change with the seasons.
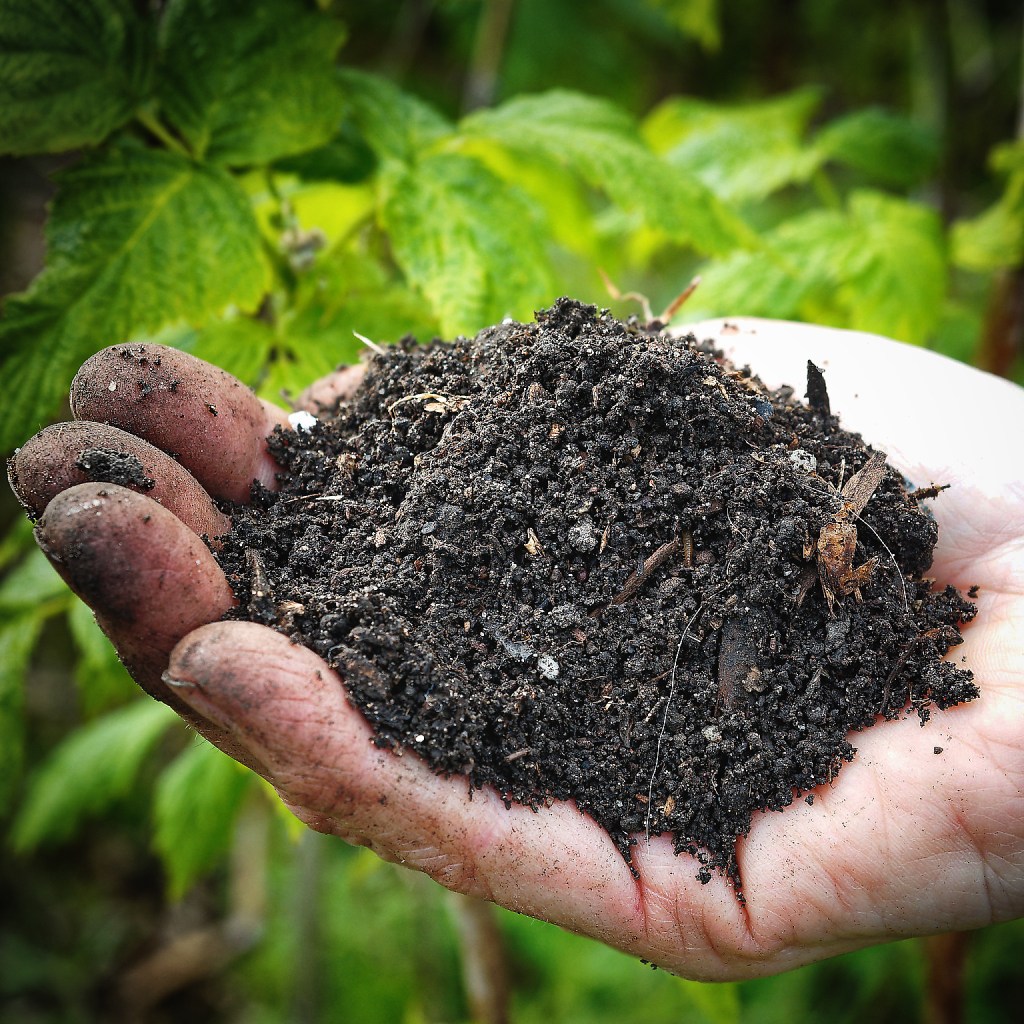
You also need to stir your compost to mix up your ingredients and add more water if too dry.After a few months, you will have your very own beautiful, crumbly, dark brown compost.
It feels almost magical turning materials that are usually seen as ‘waste’ into something so valuable to our soil.
Imagine you’re making soup. Even if you don’t have a recipe to follow, you know that you can mix something ‘oniony’, some kind of stock, some root veg and seasonings to make something delicious! We have found that with composting, you will get a ‘feel’ for ingredients and what they do, just like in cooking.
You might feel happier following a ‘recipe’ at first, and you can use the information on this website to guide you. With practice, you will get a feel for what works for you, with the materials you have to hand.
Whatever method or bin you choose, it is the bacteria, fungi, worms and other soil life that turn your waste into beautiful compost. Your job is to look after these soil creatures – it is a bit like having pets that you need to keep happy and well fed
Balance your ingredients
There are FOUR key things that soil life needs to make good compost:
CARBON
OXYGEN
NITROGEN
WATER
If your composter is missing any one of these four key ingredients, it won’t work well. Too much nitrogen or water? It will become smelly and slimy. Too much carbon or air, and it will take a long time to break down.
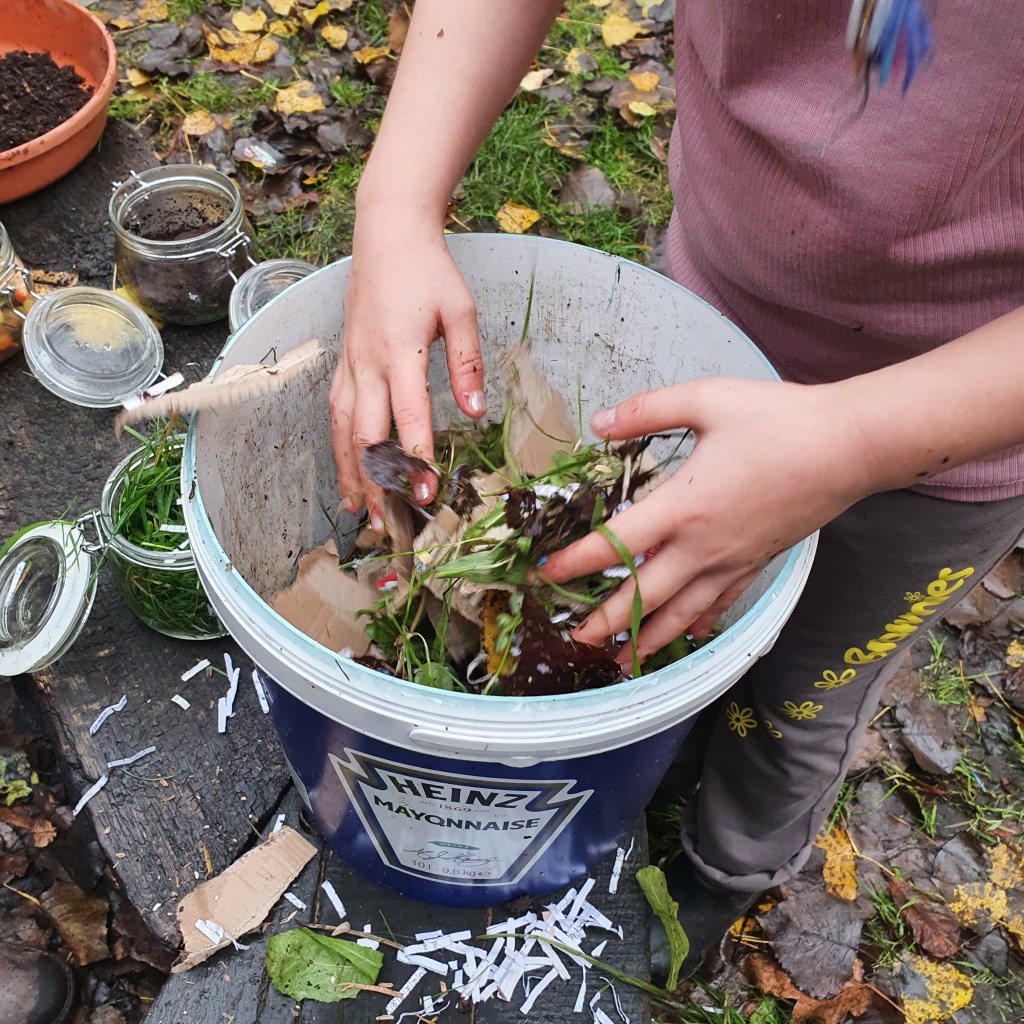
CARBON and NITROGEN (Browns and Greens)
All the stuff that you might compost contains both carbon and nitrogen, but it’s the balance of carbon to nitrogen that matters here.
If a material contains a lot of carbon, we call it a ‘brown’. ‘Greens’ have a lot of nitrogen.
A good compost pile will have a mix of ‘greens’ and ‘browns’, chopped roughly and mixed together.
‘Browns’ – this is dead, dried out stuff. Autumn leaves, woodchip, cardboard, shredded paper, dried twiggy plant material, sawdust, straw. The harder, twiggy browns add air pockets as well as carbon. Gettting enough browns in your mix will ensure that your pile doesn’t get soggy and smelly.
‘Greens’ – these are materials that are fresher and contain more water. Kitchen scraps, grass clippings, green garden cuttings, coffee grounds, weeds, chicken or farm manure. These add nitrogen and moisture and break down quickly. Greens also help keep your pile moist.
How can I tell if something is a green or a brown?
Think about what would happen if you left it on your kitchen worktop for a couple of weeks. If it’s a green, it would maybe look soggy, start going brown and start to smell. Brown materials would look exactly the same as when you left them.
Mix it up!
Go for a variety of materials, rather than just one type of green and brown. For example, a bucket of woodchip is denser and heavier than a bucket of shredded paper. Woodchip takes longer to break down, but keeps air pockets open, whereas shredded paper breaks down quickly but forms dense clumps. If you mix the two, you will get the benefits of each.
Aim for about 40% greens and 60% browns. Or, for every bucket of greens, add a bucket and a bit of browns.
Too many greens can lead to a stinky, slimy compost heap, and too many browns can lead to a dry heap that takes a long time to break down. Getting a good mix is the key to producing beautiful compost quickly and without smells.
Oxygen
Just like humans, microbes and other soil-life need oxygen to survive. You need to do two things to make sure your compost has enough oxygen:
The first thing is adding enough twiggy and hard ‘browns’. When woodchip, twiggy bits and dried plant stems are added to a compost pile they create little gaps between the green, wetter materials. These pockets of air stop our compost from becoming dense and slimy.
The second thing is to sometimes stir or turn our compost to break it up and to add new air into the pile. This can be done with a garden fork, or compost aerator, or sometimes it is easier to remove the contents of a bin completely and put them back in.
Water
Soil-life, like us, needs water to survive. Microbes also need water so that they can move around on the compost materials. Without enough water, the composting process will slow down.
When starting a compost pile, it is important to make sure enough water is added. It might be that the green materials add in enough moisture, but it can be a good idea to water any very dry brown materials such as woodchip or carboard, or leave them in the rain before adding. Keeping your compost covered will stop it drying out.
Check back on the compost regularly to see if it needs more water. Do the ‘squeeze test’ to see if your compost materials are damp enough. Take a handful of compost and squeeze it. It should feel like a wrung-out sponge, and hold together in a clump, with one or two drops coming out. If it feels too dry, then give it a good water.
Hot or Cold composting?
Hot composting: the quick, intense method
If you build your compost pile big enough and quickly enough (within a few days), with a good mix of ingredients, it will get hot. It will reach 50⁰C – 70⁰C, which is so hot you could cook an egg on it! The heat kills off diseases and weed seeds. It is also a safe way to compost meat, cooked food and grains, if your bin is rat-proofed. The ‘active’ (hot) phase lasts for at least two weeks, and you will need to turn the compost frequently to add oxygen, and to mix the waste thoroughly.
See ‘Large compost bays’, ‘HotBins’, ‘Ridans’, ‘Tumblers’. Plastic cone bins can also get hot, but this is a bit trickier.
Cold composting: the slow, laid-back method
If you add your materials gradually, you will still get fantastic compost, it will just take a little longer. This method won’t kill off weed seeds, so try to pull up your weeds before they go to seed. Lots of people do cold composting simply because they only need to compost small quantities of waste. You still need to mix greens and browns in the right ratio, but the overall amount you add will be much smaller, and you will build your pile up gradually over time.
Daleks are mostly used for cold composting, but if you fill it all in one go, with the right mix of materials, it is possible to get it hot. This takes some practice.
Pros and cons of hot vs cold composting
| Hot | Cold |
| Kills weed seeds | Weed seeds remain |
| Composting happens in about 2-6 months | Composting takes about 6 -24 months |
| You will need to turn your pile every few days while it’s in its ‘active’ phase. | Turning is a good idea, but not as necessary |
| Building a big pile in one go is hard work | Adding your materials gradually is less tiring |
| You can compost meat, fish, dairy, grains and cooked food | It is recommended only to compost raw fruit and vegetable peelings using this method (unless you bokashi your food – see our section on bokashi) |
Tips for composting if you are differently abled.
Composting, like gardening, can be a great activity for both body and mind. But the lifting and turning can be tiring, painful, or simply not possible, for many people. Here are a few suggestions for how the process can be adjusted.
Some methods require less physical work – such as cold, slow composting where there is less need for turning of materials. Adding in plenty of twiggy browns as you go will keep the bin aerated.
If you can manage to turn compost, but find it tiring, then a compost aerator may be a good investment, as it is easier than trying to turn materials with a garden fork.
An alternative way of aerating a pile can be to insert drainpipes, drilled with multiple holes, into the materials. This helps to keep extra air in the pile and reduces the need to turn.
Wormeries are small and easy to manage. They can be kept indoors, require no turning, and can be an interesting hobby.
If any composting process feels too much to manage, then websites Makesoil.com or Sharewaste.org are a great way of connecting with neighbours or local projects who are happy to take food scraps to compost them.
Useful Tools for composting
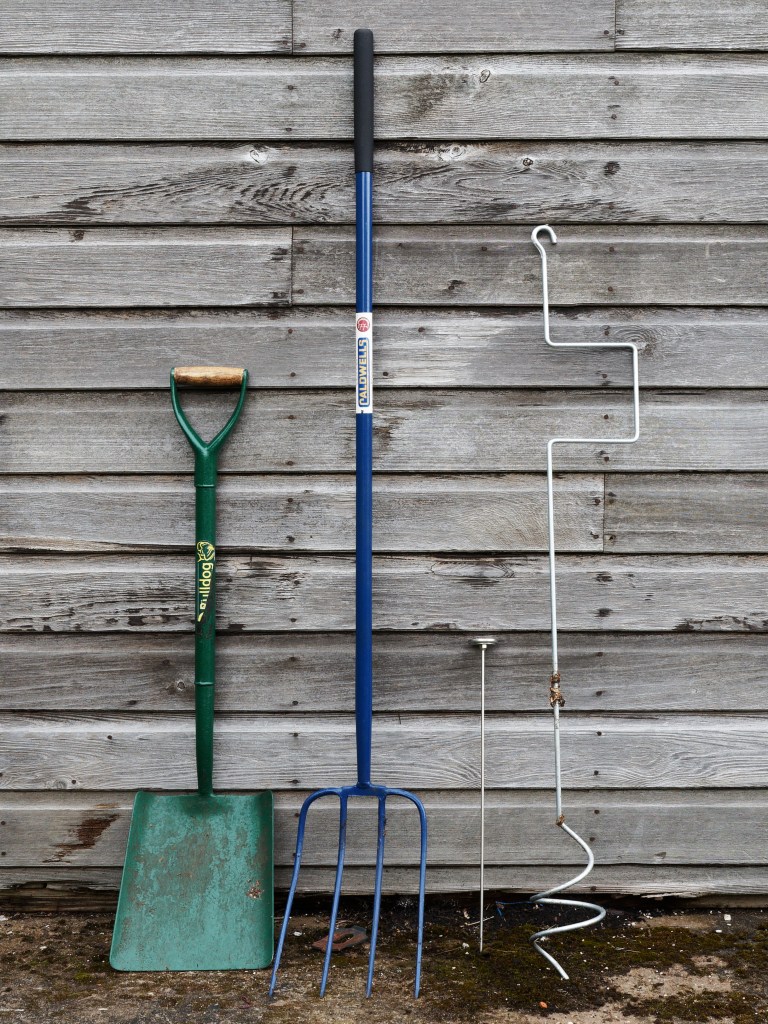
A compost thermometer – we strongly recommend this if you want to make sure that you are hot composting food waste safely.
An aerator – This makes light work of adding oxygen to your compost pile. They are particularly good for plastic cone composters (daleks), as they are a bit awkward to mix with a fork.
A shovel – These are lighter and wider than a spade and make light work of moving and mixing materials
A manure fork – lighter than a garden fork and useful both for moving garden materials and mixing.
A watering can – handy for watering a dry pile
